Table of Contents
*This post may contain affiliate links. As an Amazon Associate we earn from qualifying purchases.
Flying small planes is arguably more difficult than flying commercial jumbo jets. The touch controls are more sensitive, and you generally don’t have a co-pilot to assist. This guide will run through the crucial elements that you need to know when flying small planes.
The Ultimate Guide to Flying Small Planes
Long before you can be a pilot, you have to do a lot of training, a lot of hours behind the sticks and become certified with a private pilot’s license. Once you have the license, you will be able to take to the skies and fly your single engine or Cessna planes.
Flying a small plane is a lot more involved than flying larger, commercial planes. For starters, you will generally be piloting yourself, where a co-pilot is generally required in commercial flights. There are a lot of other differences, some smaller, some larger. This ultimate guide to flying small planes will cover all you need to know when you are in the cockpit of your own small plane.
Pre-Flight Check
Before entering the airplane, you must perform a pre-flight check. This is a standard check of everything on the outside of the plane. There is a checklist in each flight manual that must be followed. You will examine the exterior of the plane for all manners of inconsistencies, problems and to ensure all external moving parts are secure and in working order.
The pre-flight check should include the following items, at a minimum.
Check fuel and oil. This check includes visually inspecting the fuel and oil tanks, connections and hoses. You should ensure there are no leaks and that pressure is consistent.
Control surfaces. This check requires you to remove all control locks and check that the flaps, rudder, and ailerons are secure and moving freely.
Fuel contamination check. By draining a small amount of fuel into a testing glass, you will be able to ensure your fuel is free of water or oil.
Body damage. Check all surfaces of the body and propeller (known as the prop) for dents, dings, or other signs of damage. Even the slightest ding can alter the small planes ability to fly.
Weight and Balances. You will have to fill out the weight and balances sheet before boarding. This sheet ensures your plane doesn’t attempt to fly outside its limits.
Supplies. You will always need to pack essential supplies, even with the hope you won’t need them. These supplies include emergency food and water, first aid kits and if you are certified, a weapon.
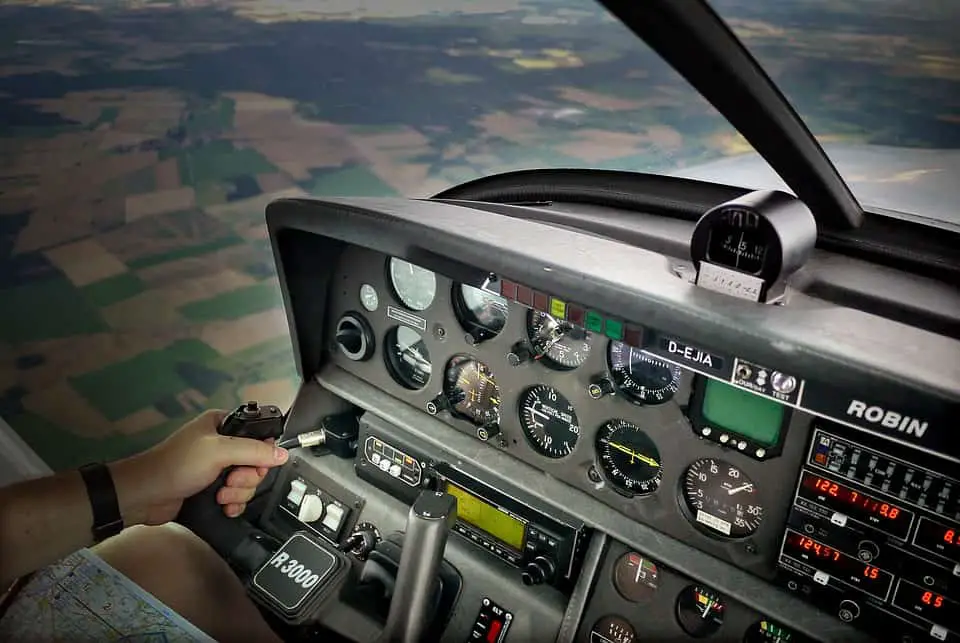
After you get in the cockpit, you will need to familiarize yourself with the controls. Make sure the six primary gauges are in working order and responsive. You will need to go through the preflight cockpit check that covers all steering and pedal components, securing of cargo and all lights, alarms and gauges are working.
The final aspect is to test the rudder pedals and yoke. After these are verified to be working it is time to get permission to fly, taxi and take off.
Taxi and Take Off
Before you can do anything, you need permission. The first step is to get in contact with ground control. They will give you important information about the taxi such as which runway to use, which lane to use wind speed, direction and other flight information you will need.
You will also get a transponder code, which is known as the squawk code. The squawk code is something you will need to write down. This information must be repeated to ground control before you can take off.
Once you are cleared for takeoff, you will begin your taxi to the runway as directed by ground control. If you are required to cross other runways, you will be given permission for each one, and you must wait for this permission before heading forward.
If your plane is equipped with wing flaps, you will need to adjust them to the take-off angle required. In most cases, this will be about 10 degrees. Your ground control or instructor will help if it is needed.
Before you get to the runway for takeoff, you will pause at the run-up area to perform an engine run-up procedure. The run-up procedure will make sure the plane is safe to fly.
After the procedure, you will get clearance from the tower to enter the runway. The tower will allow you to enter the runway when it is clear and safe to do so.
To begin the takeoff run, you will need to adjust the fuel mixture and throttle. Once the plane begins to move, you will need to adjust the yoke and rudder to stay straight on the runway. As the plane gets faster, these wind corrections will become fewer and fewer.
Once the small planes get enough airspeed, the nose of the plane will begin to lift. Once this happens, and the airspeed monitor indicates your speed is high enough, you can begin to pull back on the yoke and apply the rudder as needed.
You will have to ensure you stay at the correct climb rate. As you gain the altitude, you will place all components back to their neutral positions. This will decrease your drag, increase your flight speed and time and allow you to fly safer.
Control the Flight
In the air, the plane will need constant adjustments. You will need to keep your eye on the six main gauges, sometimes called the six-pack. However, you will also need to keep your eyes on the other gauges and indicator lights on a regular basis as well.
During the flight, temperature, wind speed, wind direction, and your heading will all change. You will need to make minor adjustments to the aircraft to ensure that you keep a level plane (except while turning, of course) and do not over adjust.
Small movements with the instruments are crucial. It is easy to over-correct and ends up causing more problems than you are solving. If you find that your nose is dipping a little below the artificial horizon, you will need to make small incremental changes to the yoke to correct it.
If you make too large of a correction, you can put the plane in a critical rise, which if over corrected can result in a critical dive, resulting in engine stalling or worse.
When you do need to turn, you will move the yoke or stick to the left or right, and you will need to use your feet to adjust the rudder. Your eyes will mainly be on the turn indicator, though you will still need to watch all other gauges during and after the turn is completed.
While you are flying, your engine speed and trim should remain constant. You will only increase speed during a turn or rise in altitude. All other controls are done with light touches to the control knobs.
The purpose of the constant scanning and decreased engine performance is similar to that of driving a car. You need to maintain the engine working properly without overworking it. Similar to driving, you can maintain speed without having the RPM gauge stay in the red.
Final Approach and Landing
Using the sectional chart, you will need to find the radio frequency for air control or the tower. Once you are within range, you will need to establish contact and follow any directions they have for you.
Because of other air traffic, both incoming and outgoing, you may not be able to approach and land right away.
The tower may provide you with a different route, heading or altitude until it is your turn to land. When it is time to descend you will need to adjust the flaps and begin slowing your airspeed. As you approach the runway, you will slowly tilt the nose downward, find your aim spot and focus on it. Don’t forget to maintain constant visual on your gauges as well.
The most challenging aspect of flying is in the landing. You will need to maintain enough airspeed to keep from crashing but is slow enough to maintain correct approach and descent angles.
Once you can see your runway, watch the numbers closely. The numbers indicate your angle and will alert you if you are landing short or long. You will still be coming down and slowing the aircraft.
When you make the final approach, put the engine in idle and slightly raise the nose of the plane until the main wheel makes contact with the ground. As the forces of nature and physics take over, the nose of the plane, and thus, the front wheel, will be pulled down, you don’t need to force it.
Once all the wheels are on the ground, you can begin braking. You should note that you will not come to a complete stop on the runway. While braking and steering, you will be given instructions by the tower on which exit to take and where to come to a stop.
Follow the lights, numbers, and indicators to find your final stopping point. Congratulations, now you can fly small planes.